
Quick answer
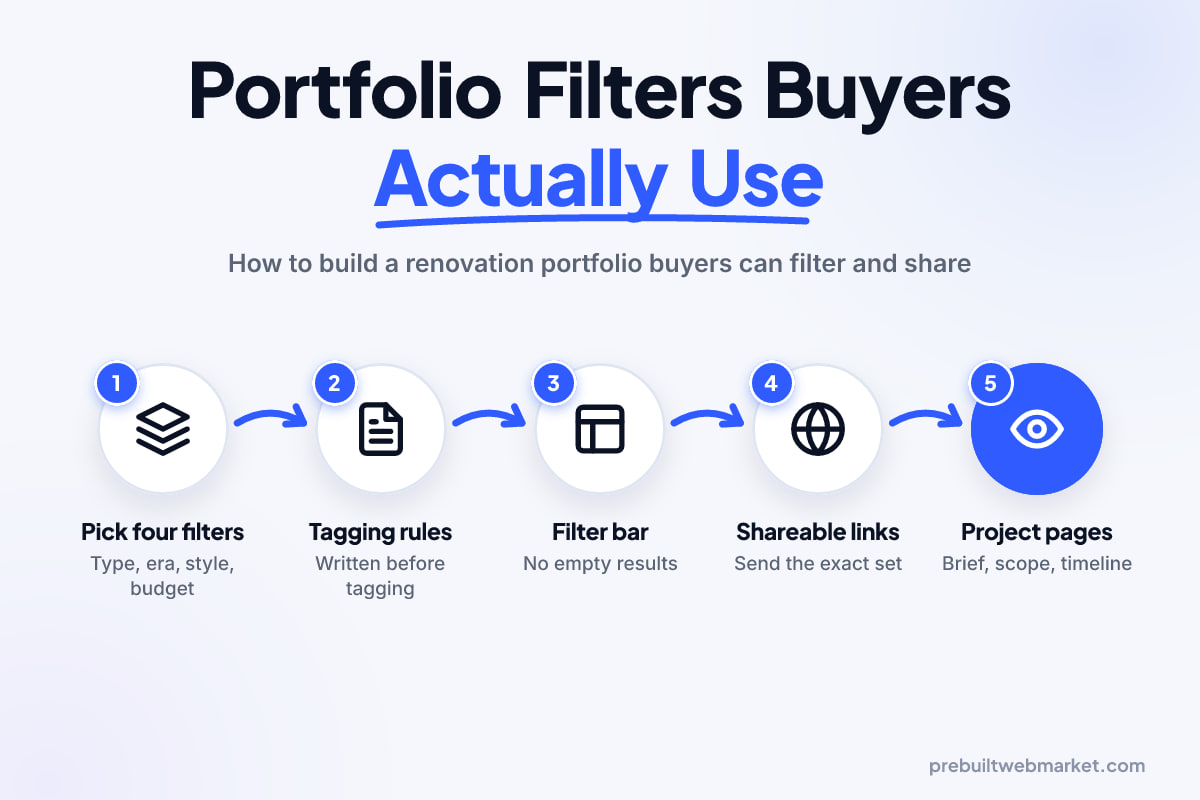
Build your renovation website portfolio around the question every buyer brings: have you done a job like mine? Filter by project type, home era, style and budget band, tag every project against written rules, make each filtered view a shareable link, and give every project its own page with the brief, scope, timeline, challenges and a budget band, not just finished photos.
Key takeaways
- Four filters are enough: project type, home era, style and budget band. More filters mostly produce empty results.
- Write the tagging rules down before you tag anything, so a 1950s ranch is never a "mid-century" project on one page and "post-war" on another.
- Show a budget band on every project. It answers the question buyers are least willing to ask, yet many contractors leave it off.
- Every project page should cover the brief, the scope, the timeline and one real challenge, with photos from during the job as well as after.
- Make filtered views shareable links so couples can send each other the exact set of kitchens they are looking at.
- Measure which filters people use and which project pages lead to consultation requests, then shoot more of what they look for.
In this article
- What your renovation website portfolio must achieve
- Before you start: what to gather
- Step 1: choose four filters, not twelve
- Step 2: write the tagging rules down
- Step 3: build the filter bar
- Step 4: make every filtered view a link you can send
- Step 5: build the project card
- Step 6: write project pages that show the job, not just the finish
- Step 7: keep a photo-heavy website fast
- How to test it before it goes live
- What to measure after launch
- Where the usual advice is the wrong answer
- Adding portfolio filters to your website
- Your next step
- Frequently asked questions
A renovation website portfolio works when a homeowner can find, in under a minute, a finished project that looks like their own house: the same kind of room, a home of the same age, a style they like and a budget in their range. Build it with four filters (project type, home era, style and budget band) and give every project its own page that explains the brief, the scope, the timeline and what went wrong along the way.
That matters more in renovation than in most trades, because a buyer is about to hand a stranger their home and a five or six figure sum. A gallery of fifty glossy kitchens tells them you are capable. A filtered set of six 1920s kitchens in their budget, each with a page showing how the job actually went, tells them you have done their job before. This guide builds that page from nothing, in the order you would actually do it.
What your renovation website portfolio must achieve
Your renovation website portfolio must answer one question for each visitor: “Have you done a project like mine, in a house like mine, for roughly my budget?” Everything on the page serves that question.
In practice that means three parts. A portfolio index with a filter bar and project cards. A project page for each job. And a small set of fixed category pages, one for each main project type you sell, such as kitchens, bathrooms, basements, additions and whole-home renovations. Our look at prebuilt and custom renovation websites covers the other pages a website for renovation company owners needs; this guide stays on the portfolio.
Why the portfolio has to qualify buyers
A buyer planning a modest bathroom who scrolls through huge whole-home rebuilds assumes you are out of reach. A buyer with a 1910 farmhouse who only sees new-build basements assumes you have never opened a plaster wall. Filters let each buyer see the slice of your work that applies to them.
Every path through the portfolio should end at a request for a design consultation, made while the buyer is looking at the project closest to their own.
Before you start: what to gather
Gather your project list, your photos and your numbers before you design anything, because the filters you can offer depend entirely on what you can document. Most owners find fewer usable projects than they expected, which tells you what to photograph next.
A project list in a spreadsheet
Make one row per finished project with these columns: a working name, the town or neighbourhood, the year completed, the project type, the year the home was built (or your best estimate), the style, the final contract value, how long the job took from design sign-off to handover, and whether you have client permission to publish. Do not filter anything yet.
Photos, including the ugly ones
Pull every photo for each project into its own folder: before, during and after. The during photos matter more than most contractors think: opened walls, structural steel going in and a framed addition show buyers how you work.
A project with only three phone shots can still go in the portfolio as a short entry, not a full project page.
Numbers you are willing to publish
Decide now how you will talk about money. You will not publish invoice totals, but you will publish bands, and the bands need to fit your market. Set them from your own project list so each band holds a fair share of your work.
Step 1: choose four filters, not twelve
Four filters (project type, home era, style and budget band) cover what renovation buyers use to judge fit, and they are the right starting set for almost every renovation company. Each extra filter divides your projects again and makes empty results more likely, so add one only when you have the work to fill it.
Project type
Project type is the filter everyone uses first. Use the names buyers search for: Kitchens, Bathrooms, Basements, Additions, Whole-home, Outdoor living. Keep it to six or seven values. If you have only two attic conversions, fold them into Additions for now. Match these values to the service pages on your renovation website so the words are the same everywhere. You can see how a portfolio sits beside service, process and financing pages in our renovation website demos.
Home era
Home era is the filter that separates a renovation portfolio from a new-build gallery, because the age of a house changes what is behind the walls, what the structure can carry and what the owner wants to keep. A buyer with a 1920s bungalow wants proof you can work with original trim and old framing, not proof you can fit out a 2015 tract home.
Use broad bands a homeowner can place their house in. An illustrative set for a US market might be: before 1940, 1940 to 1979, 1980 to 1999, and 2000 or later. Name them in plain words where it helps, such as “Pre-war homes” or “Post-war ranches”, but always show the years, because buyers know when their house was built, not what period it belongs to.
Style
Style is the filter most likely to become a mess. Pick five or six styles you actually build, in words homeowners use: Traditional, Modern, Farmhouse, Craftsman, Transitional, Coastal. Avoid design-magazine terms that only you and your designer understand.
Style is the one filter where a project can sensibly carry two values, for example a modern kitchen in a Craftsman house. Allow two at most, or the filter stops meaning anything.
Budget band
Budget band answers the question buyers are least willing to ask on the phone, yet many contractors leave it off. Without it, every visitor guesses, and the guess is often that you are too expensive.
An illustrative set might be: under $50,000, $50,000 to $100,000, $100,000 to $250,000, and over $250,000. Build yours from your own project list so each band holds real work. Label the filter “Investment” or “Project budget”, show the band on every project card, and note the year of completion so a 2019 price is read as a 2019 price.
What to leave off the filter bar
Leave off materials, square footage, room count, finish brands, crew lead and anything in trade language. Leave off location unless you serve distinct towns or neighbourhoods that buyers genuinely care about, in which case a single “Area” filter can earn its place. Each sounds useful in a planning meeting and returns one project or none.
Step 2: write the tagging rules down
Write a one-page tagging guide before you tag a single project, because inconsistent tags break filters faster than bad design. If one person tags a 1955 ranch as “1940 to 1979” and another tags a 1952 house as “Pre-war”, the filter quietly hides work you want buyers to see.
For each filter, list every allowed value and how to decide between them. For example: “Project type: the main room or scope the client hired us for. A kitchen with a small adjoining mudroom is a Kitchen. A kitchen, two bathrooms and new flooring throughout is Whole-home.” “Home era: the year the original house was built, not the year of any previous addition.” “Budget band: final contract value including change orders, excluding appliances the client bought directly.”
One value per filter, with one exception
Give every project exactly one project type, one home era and one budget band, and up to two styles. That rule keeps result counts honest and stops one project appearing under every heading.
Name projects the way buyers describe them
Replace internal job names with titles that carry the filter information in words. “Henderson job” means nothing to a buyer. An illustrative title such as “1926 bungalow kitchen with original trim kept” tells them the type, the era and the style before they click.
Step 3: build the filter bar
Build the filter bar as a short row of grouped choices that updates the results without moving the visitor anywhere, shows how many projects match, and never strands them on an empty page. On a phone, that row collapses behind a single “Filter projects” button that opens a panel.
Group each filter with a visible label
Each filter should be a labelled group: a heading such as “Home era” with its choices beneath. The W3C’s guidance on Info and Relationships explains why the grouping has to exist in the code and not only in the layout: “form fields may be positioned as groups that share text labels”, and that relationship needs to be available to people using screen readers. In plain terms, ask your developer to mark each filter up as a fieldset with a legend. It costs nothing and it makes the filters usable for everyone.
Update the results, do not jump the page
When a visitor ticks “Kitchens”, the result list should update where they are. It should not reload to a new page, scroll them to the top or open something else. The W3C’s explanation of On Input notes that “checking a checkbox” changes a setting, and that changes of context “are appropriate only when it is clear that such a change will happen in response to the user’s action.” A filter that silently navigates away is exactly the surprise that guidance warns about.
Show a result count people can hear
Put a short line above the cards that says “8 projects match” and updates as filters change. The W3C’s guidance on status messages uses this exact situation as its example: a message such as “18 results returned” or “No results returned” should be announced by screen readers without taking focus. Your developer does this with a status role on that line.
Never show an empty page
Grey out any choice that would return nothing given the filters already selected, and show its count next to it, such as “Additions (0)”. If a buyer still ends up with no matches, show a helpful message and the nearest projects: “No 1920s additions yet. Here are our additions on other older homes, and our 1920s kitchens.” Then offer the consultation link.
Always include a clear “Reset filters” control beside the count.
Step 4: make every filtered view a link you can send
Every filtered view should have its own address, so a buyer can send “our kind of kitchen” to their partner and the link opens with the same filters ticked. Renovation decisions are usually made by two people, often on different devices at different times.
The common way to do this is to write the selected filters into the page address as parameters, for example /portfolio?type=kitchen&era=pre-1940. MDN’s reference for the History pushState() method describes the browser feature that makes it work: it “adds an entry to the browser’s session history stack” and can set a new address without reloading the page. That also means the back button steps back through the filters the buyer chose, which is what people expect.
Keep filter links and real website pages separate
Treat the filter links as tools for people and the fixed category pages as the pages you want found in search. Four filters with five or six values each can produce hundreds of combinations, nearly all of them thin and similar. They do not need to be in your sitemap.
What should be in your sitemap is one proper page for each main project type, such as Kitchens, Basements and Additions, with a written introduction, the projects of that type and a short FAQ, plus a page for every project. Those are the pages a buyer searching Google or asking an AI assistant can actually land on. Our renovation website design guide for Alaska shows how project-type pages fit alongside town pages for one region.
Step 5: build the project card
The project card should tell a buyer whether a project is worth opening before they open it: one strong photo, a descriptive title, and a single line with the era, budget band and duration. Cards that show only a photo force buyers to click through a dozen projects to find the two that apply.
A good card holds, in this order:
- One photo of the finished space, cropped to the same shape on every card so the grid stays tidy.
- The title, written as described in step 2.
- A detail line, such as “Built 1926 · $50k to $100k · 11 weeks”.
- The town or neighbourhood, which matters to local buyers.
Make the whole card the link, and leave off star ratings and client names.
Pick the cover photo for the brief
Choose the cover image that shows what the client hired you for. If the brief was to open a wall, a wide shot of the new open plan beats a close-up of the range hood.
Step 6: write project pages that show the job, not just the finish
Each project page should tell the story of one job: what the client wanted, what you did, how long it took, what went wrong and how it was solved, with photos from every stage. This is where a renovation website portfolio stops being a gallery and starts doing the work of a first consultation.
Use the same structure on every page so buyers learn where to look.
The brief
Open with two or three sentences in the client’s terms, written as an illustrative example here: “A family of five in a 1926 bungalow wanted a kitchen they could all cook in, without losing the original windows and trim that made them buy the house.” The brief is what a buyer compares against their own situation, so write it about people and a house, not about cabinetry.
The scope
List the work in plain words: walls removed or moved, structural changes, plumbing and electrical updates, finishes, and anything the client handled themselves. A short bulleted list is fine. Name permits and inspections in general terms, such as “permits and inspections handled by us”, without quoting local rules you have not checked.
The timeline
Give the length of each phase: design and selections, waiting for permits and materials, construction, and the snag list before handover. A real timeline from a real job is more convincing than any promise on your process page. If the job ran over, say by how much and why.
One real challenge
Every renovation has a moment when a wall is opened and the plan changes. Describe one, for example: rotten sill plates under the old back door, a beam that needed engineering, a discontinued tile that had to be matched. Say what you found, what you recommended, what it did to the timeline and the cost, and how you told the client. It shows buyers how you behave when something goes wrong.
Before, during and after
Show photos in that order. The during photos prove the work behind the finishes: new framing, insulation, wiring, waterproofing. Caption each one with what it shows, describing the work rather than the mood.
The close
End every project page with a short line and a link: “Planning a similar project in an older home? Request a design consultation.” Pass the project name into the form so you know what the buyer was looking at when they asked.
For a sense of how a portfolio-led design can carry long project stories without feeling cluttered, open the Atelier Northwest renovation demo, set in Bellevue, Washington, which treats whole-home design-build work in an editorial style. You can compare it with the other designs on our page of renovation website demos.
Step 7: keep a photo-heavy website fast
Keep the portfolio fast by sizing every image for the space it fills, giving each one its dimensions in the code, and letting the browser hold back photos further down the page until they are needed. The portfolio is usually the heaviest page on a renovation website.
MDN’s reference for the image element is clear on the two settings that matter most. Including width and height “enables the aspect ratio of the image to be calculated by the browser prior to the image being loaded”, which reserves the space and reduces “or even prevent[s]” the page jumping as photos arrive. And the loading attribute set to “lazy” defers an image “until it reaches a calculated distance from the viewport”. MDN adds that dimensions are “especially important for lazy-loaded ones”.
In practice, ask for three things:
- The first row of cards loads normally. Only cards below the first screen should be lazy-loaded, so the photos a buyer sees first appear straight away.
- Every card image has width and height set, so filtering does not make the grid shuffle and jump.
- Several sizes of each photo are produced, so a phone downloads a phone-sized image, not the 6,000-pixel original from your photographer.
What the filters do to speed
Filtering should hide and show cards that are already on the page, or fetch a small list of results, not reload every photo. If you have more than about forty projects, show the first twenty and a “Show more projects” button rather than loading everything at once. A button beats endless scrolling because buyers can still reach the consultation link at the foot of the page.
How to test it before it goes live
Test the portfolio by trying to find specific projects the way buyers will, on a phone, before anyone else sees it. Five checks catch most problems.
- The three-buyer test. Write three short buyer descriptions, such as “1950s ranch, wants a modern kitchen, about $70,000”. Hand them to someone who has never seen the page and time how long it takes them to find a relevant project. Anything over a minute means a filter label or a tag is wrong.
- The empty-result test. Try every combination of two filters. Any pair that returns nothing should show greyed-out options and the helpful fallback message, not a blank grid.
- The shared-link test. Filter on your phone, text the link to yourself and open it on a laptop. The same filters should be ticked. Then check the back button steps through your filter changes.
- The keyboard and screen reader test. Tab through the filter bar without a mouse, then turn on your phone’s screen reader and check the result count is read out when a filter changes.
- The mobile data test. On a phone, on mobile data, the first row of photos should appear quickly and the grid should not jump.
What to measure after launch
Measure which filters people use, which projects they open, and which project pages lead to a consultation request. Those three numbers tell you what buyers are looking for and what to photograph and document next.
Filter use
Record each filter change as an event in your analytics, with the filter and value. After a couple of months you will see patterns, such as many buyers filtering for pre-1940 homes and finding only three projects. A popular filter with thin results is your list of jobs to photograph properly next season.
Zero-result searches
Count how often buyers reach the empty-result message and which combinations caused it: each is work you are asked for and cannot yet show.
Project page to consultation
Because the form records which project page the buyer came from, you can see which projects start conversations. They deserve the best cover photo, the fullest story and a place near the top of the default order.
What not to read too much into
Do not judge the portfolio on time on page. A buyer who finds the right project in twenty seconds and requests a consultation has had a better visit than one who browses for ten minutes and leaves.
Where the usual advice is the wrong answer
Some common portfolio advice works against renovation companies, and two pieces of it are worth ignoring.
“Only show your best work”
The usual advice says to show only your ten most beautiful projects. For renovation, that hides the work most buyers are actually planning. An illustrative $35,000 bathroom in a 1970s split-level is less photogenic than a $400,000 whole-home rebuild, but it may be far closer to what most of your enquiries want. Show the range you want to sell, tagged honestly, and let the filters do the curating.
“Never mention money”
The usual advice says prices start arguments, so leave them for the consultation. In practice, buyers who find no sign of your price range either leave or book a consultation they cannot afford. A budget band on every project is the most effective qualifying tool your renovation website has.
Adding portfolio filters to your website
You can build all of this from scratch with a developer, add it to an existing site with a plugin, or start from a design where the portfolio already exists. A custom build gives the most control and takes longest; a plugin is quick but may reload the page or create hundreds of indexable combinations; a prebuilt design is fastest if its portfolio already works the way this guide describes. Our comparison of website options sets out the trade-offs fairly.
In renovation web design from us, every prebuilt renovation website includes a project portfolio with filters, alongside process, financing and consultation pages. The Buildwell Renovations demo, set in St. Louis, Missouri, shows the same structure for a fixed-price design-build company. Plans start at $97 a month with a $297 setup fee and include 3 content edits a month, which covers adding new projects as you finish them; all three plans are on our pricing page. If you would rather build it yourself, the steps above work on any platform. Our guide to how long a business website takes to build will help you plan the time either way.
Your next step
Open a spreadsheet tonight and list every finished project with its type, the year the house was built, its style, its final value and whether you have the photos and permission to show it. That list tells you which filters you can support today and which projects to document properly on your next jobs.
If you would like a second pair of eyes on the list, or want to see how your projects would sit in a ready-made renovation portfolio, book a free 45-minute call and we will go through it with you.
Sources
Frequently asked questions
How many projects do I need before portfolio filters are worth building?
Around twenty documented projects is a sensible point to add filters, because below that most combinations return one or two results and the filter bar feels empty. With fewer projects, group them under plain headings by project type on one page, write full project pages for the best ones, and add filters once you have enough work to make them useful.
Should I really show budgets on my renovation website portfolio?
Show a band, not an invoice total. A band such as "$50,000 to $100,000" tells a buyer whether you work at their level without exposing a client's private figures or tying you to an old price. Ask the client before publishing, use bands you set for your own market, and note the year the work was done so older prices are read in context.
What filters should a renovation portfolio have?
Project type, home era, style and budget band cover what most homeowners use to judge whether you have done a job like theirs. Add location only if you work across distinct towns or neighbourhoods that buyers care about. Avoid filters for materials, room size or contractor jargon, which produce thin results and confuse people who are new to renovating.
Do filtered portfolio pages help with Google rankings?
The filtered combinations themselves rarely help, and thousands of near-duplicate filter URLs can waste crawling. What helps is a small set of real pages: one for each main project type, such as kitchens, basements and additions, plus a full page for every project. Keep the filter combinations as shareable links for people, and keep the pages you want found in your sitemap.
What should a renovation project page include besides photos?
The brief in the client's terms, the scope of work, how long it took from design to handover, one challenge you solved, the home's era and style, a budget band, and photos from before, during and after. Finish with a link to request a consultation for a similar project. Those details answer the questions buyers would otherwise ask on the first call.
Can I use photos from projects where we were a subcontractor?
Only if you say clearly what your part was and you have permission from whoever owns the relationship with the client. Presenting a whole-home project as yours when you did the cabinetry misleads buyers and usually surfaces at the first consultation. Tag it under the work you actually did, such as "cabinetry and millwork", and describe your scope honestly on the project page.